
Using a Rotary Cutter
Rotary
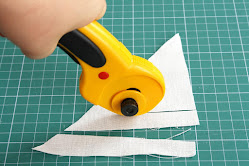
cutters need to be used with a special cutting mat beneath the fabric –
This insures that as you move the cutter, it doesn't end up leaving a
mark or cut your cutting surface. These blades are very sharp and
cutting mats are available in many shapes, sizes and cost levels.
Make
sure your fabric is folded so the selvages are parallel with each
other. This is especially important if the fabric has been pre-washed or
came off the bolt wonky. It’s always a good idea to double check that
the fabric lays flat and doesn’t have a twisted look.
One thing
to watch out for is ruler creep. After cutting several strips or
sub-cuts, sometimes, you will see the ruler is no longer square on the
folded edge. That means it’s time for a new clean up cut.
Acrylic rulers (vs. Metal Yardsticks) are a must.
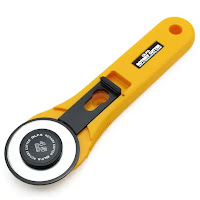
Which size of rotary cutter do I need?
They come in a variety of sizes; the larger the blade size, the faster you can cut.
- 28mm blade this smaller blade ideal for pattern cutting in dressmaking, when cutting tight curves and small cuts.
- 45mm blade is the most common and for general usage
- 60mm blade is ideal for cutting strips and trimming fabric lengths. Larger cutters will cut thicker fabric and more layers in one go. Often used with cutting mats and rulers, they speed up cutting fabric for quilting and home sewing.
Top Tips:
- It’s best to place your mat on a hard surface like a table or counter top.
- We find it easiest to stand up while you cut, as you can apply more even downwards pressure on the cutter. A cutting surface suited to YOUR height is best. (i.e., Ginger trying to cut at my table does not work for her)
- Practice holding the cutter before you start – you may prefer to put your index finger on top, or wrap all your fingers around the handle. Keep your wrist straight and always cut away from you, as this is safer and you’ll get a neater cut.
- If you’re cutting with a ruler, hold it firmly in place with your other hand, making sure your fingers are all on the ruler and not hanging over the edge. Apply pressure to the cutter then push it alongside the ruler.
- The cutting blade is circular and extremely sharp so it will glide through the fabric easily. You will need to press firmly to cut through the fabric, but not too hard or it won’t go through smoothly and you may slip and hit the ruler, which can dull the blade and chip the edge.
- Once you’ve finished cutting, always lift the ruler rather than sliding it, then move it into the next position – never move the fabric or you’ll lose accuracy.
- Clean the dust and fabric lint from your blade regularly, and slide the guard back over the blade as soon as you’ve finished cutting before putting it down for safety.
Left Handed Quilters
OK, disclosure, I am not a South-paw, but several ladies in my quilt bees are (heads up Michelle and Gail S in Houston). Some rotary cutters are more easily converted to the lefties than others. Mainly you are installing the blade on the 'other' side of the cutter than for the right handed folks. For me, hard to describe, but trust me, just opposite of the 'default' installation.
If
you are left-handed ensure you pick your rotary cutter carefully. Most
tools (and Scissors) are designed for right-handed people. These will be
extremely uncomfortable for lefties to use and could result in some
serious repetitive strain! Make sure your cutter have been designed for
both right and left-handed people like the Olfa Deluxe, which are easily
modified for our lefties. Gingher Scissors are also available for
lefties.
Cutting Using the Ruler Measurements or the Mat Measurements
There are many ways to accurately cut strips. Use the SAME measuring process for entire quilt.
- Using the measurement of a ruler
OR - Using the measurement of a rotary mat.
Mat Measurements
While lining up
fabric on the cutting mat. So if cutting 2" strips, line fabric on mat. Use a ruler to easily cut strips using
mental calculations, making cuts at 20", 16", 14" etc. So place the ruler on even numbers, cut,
move ruler to the left 2 inches, cut, move ruler 2" , cut.
Using Ruler measures
Note – use the SAME ruler during a project. The lines on a ruler or mat can change the accuracy. All rulers are not printed equally. By the same token, if you usually use the outside (or inside) of the line on the ruler, that can cause inaccuracies.
- Using Mat - 2” or 1.5” Gotta use your mental math skills
- Using specialty rulers – specialty cutting for specialty projects
If using a quilt ruler, note whether you are using the 'inside' or
'outside' of the mark on your ruler. What? The marks on a ruler can be
up to an 1/8th inch on the ruler. If you are piecing large blocks,
this is not going to be too much of an issue. However, if there are
many seams, that little 1/16th of an inch adds up to a big discrepancy
over the entire block. ( 1/16 + 1/16 + 1/16 + 1/16 = 1/4 inch) in final
size of the block.
When to change blades
- Skipping threads
- wrist hurting
- Grooves in cutting mat
- You ran over a pin or into a ruler.
- When you are struggling to make a good cut.
 |
| Click for a larger file |
I promise. When you install a new blade, and your cuts are like butter, you wonder why you waited to put in a new blade!
Rulers
Wow, there is a ruler out there for EVERY thing you can think of.
My Top three:
- Stripology - The ruler has slits for cutting in 1/2" intervals and extra markings for common pre-cut sizes like 1-1/2" and 2-1/2" strips.
- June Tailor – My favorite. Can cut WOF in 2.5”, 5” or 10” sections. We used this for cutting sashings in our t-shirt quilt business.
Note: With a WOF, using the 2.5” slots, you can get (17) 2.5” cuts!
When cutting Sashings, cut the length of what you need, sub-cut into 2.5” strips. - Creative Grids - my favorite branded rulers
You may also be interested in:
- Quilting 101 - Quilting Tips & Tricks
- Quilting 101 - Cleaning Your Iron
- Quilting 101 - Pressing Vs Ironing
- Quilting 101 - Starching For Quilting
- Quilting 101 - How to Use a Rotary Cutter
- Quilting 101 - What is Better - Scissors or a Rotary Cutter?
This Quilting 101 series is a compilation of the demonstrations and lectures that we have been providing to the Mulberry Chapter of the Quilt Guild Of The Villages. (QGOTV) in Florida. We began this series with various speakers. Many thanks to Barb, Dale, and MaryAnn and Betty B. for their contributions. I have been taking the notes and turning them into blog posts to share with other quilters.
For Mulberry Quilters click HERE for a video of the presentation. This is a private FB group for members of the Mulberry Quilters.
Mulberry Quilting is a Chapter under the larger umbrella of
the Quilting Guild Of The Villages (QGOTV). In July of 2023, QGOTV
membership count is 1,238. Chapters are formed in different regions of
The Villages, a 55+ retirement community in Central Florida.
At Shadywood Quilts, we have been providing professional machine quilting for over 20 years. We use a computerized quilting system that gives you the highest quality stitch and pleasing patterns across your quilt.
No comments:
Post a Comment